A Complete Guide to Floor Sanding Times and Drying Stages
If you are planning a floor restoration project, one of the first questions you will ask is simple: how long does floor sanding take? The honest answer is that it depends on the size of the room, the condition of the timber, the number of repairs required, and the finish you choose. For most South West London homes, however, professional floor sanding is usually measured in days rather than weeks. If you want local advice or a clear quote, start with South West London Floor Sanding, where you can arrange an assessment and discuss your room sizes early in the process. The company highlights 99% dust-free sanding, repairs, staining and refinishing as part of its core service, which is important because the full timescale is not just about sanding alone but about the entire restoration sequence.
In practical terms, a small bedroom may be completed in a day, while a larger through-lounge, hallway and adjoining room may take two to three days once preparation, sanding, edging, finishing and drying between coats are included. Extra time is often needed where there are loose boards, missing parquet blocks, deep scratches, old bitumen residue, multiple previous coatings, or colour staining. Bona’s current technical sheet for Traffic HD says the first coat typically dries in around two to three hours under normal conditions, while full cure takes about three days; Osmo’s Polyx-Oil systems dry much more slowly and may take around eight to ten hours between clear coats, with full cure often around ten to fourteen days. That is why the real answer to “how long does floor sanding take from start to finish?” always includes both working time and finish-curing time.
A realistic floor sanding timeline for South West London homes
For an average domestic room, the work normally follows a predictable order. First comes the survey, then room preparation, then repairs, then the main sanding sequence, then edge work, fine sanding, vacuuming, finishing coats and drying periods. If the floor is in decent condition and you choose a fast-drying lacquer, a straightforward room can often be sanded and sealed within one working day, with light foot traffic possible the following day. If you choose an oil-based or hardwax oil system for a more natural look, the appearance can be stunning, but the overall timetable is usually longer.
A sensible rule of thumb looks like this:
Small room or box room: around 1 day
Average lounge or bedroom: around 1 to 2 days
Large open-plan room or multiple connected rooms: around 2 to 3 days
Parquet floors with repairs or staining: often longer, depending on pattern condition and drying windows.
That matches the broad picture shown across the site’s own recent blog content, where parquet projects are described as taking one day for a small area, one to two days for an average lounge or dining room, and longer for larger or more complex spaces.
What happens before the sanding even begins?
Many homeowners think sanding starts the moment the machine is switched on. In reality, the clock starts earlier. Furniture needs to be cleared, curtains and low-hanging fabrics may need protection, and the floor must be checked for protruding nails, unstable boards, cracked parquet blocks, old adhesives and any moisture-related concerns. NWFA technical guidance emphasises that site conditions, moisture and surrounding wet trades all matter before sanding and finishing begin, because poor conditions can delay or compromise the result.
In many South West London properties, especially Victorian and Edwardian homes, preparation can take longer than clients expect. Uneven floorboards, earlier patch repairs and a build-up of old finishes often slow the first stage. That is one reason a professional inspection is worth doing before promising an exact completion time. It also explains why experienced contractors do not quote by room size alone.
Day one: preparation, repairs and the first sanding passes
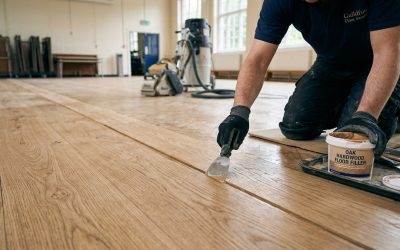
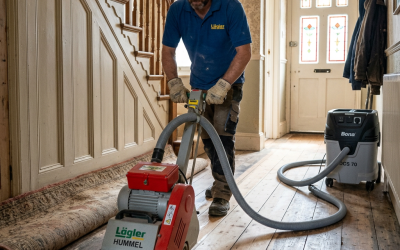
For most jobs, day one is where the visible transformation begins. The team will inspect the timber closely, secure loose boards or blocks, punch down nails, repair minor damage and make sure the surface is safe for machinery. On parquet floors, loose or missing blocks may need rebonding or replacement before the main sanding can proceed. On plank floors, gaps or isolated damage might be addressed after the first cuts expose the true condition of the timber. The site’s service pages repeatedly position repairs, matching timber inserts and gap filling as part of the restoration workflow rather than an optional extra, and that is exactly how an efficient job should be planned.
Once the floor is ready, the first sanding pass removes the old finish and begins levelling the surface. Heavily worn boards, blackened edges, paint contamination or cupping will slow this stage because extra passes may be needed. Recent guidance on the site’s “Panic-Proof” sanding article also notes that grit progression matters, with final sanding often finishing around 100–120 grit for lacquer systems and around 100 grit for oils. That detail matters because sanding time is not only about area; it is also about how refined the surface must be for the chosen finish.
Edge sanding, corners and detail work usually add more time than people think
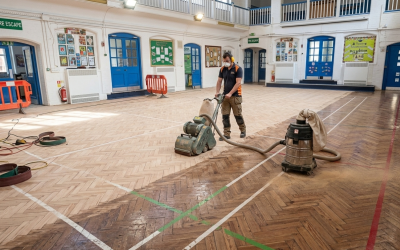
A large belt or drum sander deals with the main body of the room, but it cannot reach every edge, fireplace, threshold, bay window, radiator pipe or tight corner. Those areas need edging machines, corner tools and hand finishing. On period homes, these awkward sections can add a surprising amount of labour. Straightforward square rooms move faster; rooms with alcoves, fitted joinery and multiple transitions do not.
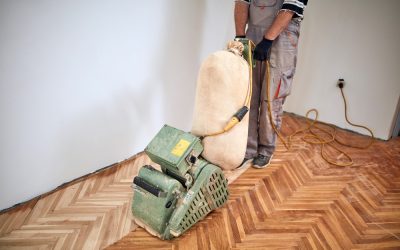
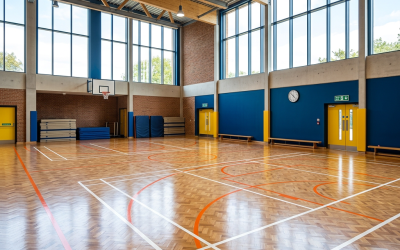
This is especially true with parquet and herringbone. The site’s recent parquet article makes clear that pattern floors require more controlled sanding to preserve sharp lines and avoid ridges, swirl marks or blurred block edges. So when a homeowner asks, “why is parquet taking longer than standard boards?”, the answer is simple: detail, precision and repair sensitivity.
For related reading, you could internally link to:
- Parquet Floor Sanding South West London – Sharp Lines, Rich Grain
- Hardwood Floor Refinishing SW London – Smooth, Durable, Like New
- Panic-Proof Your Floors: Master Wood Floor Sanding Today
How long does the finishing stage take?
This is the stage most likely to confuse clients. The sanding itself may be done, but the room is not fully “finished” until the coating system has been applied and given enough time to dry and cure properly. A fast water-based lacquer can keep the schedule moving. Bona Traffic HD’s current technical data says the first coat dries in roughly two to three hours in normal conditions, the floor may be walked on after 24 hours, and full curing takes around three days. That makes it a strong option where downtime must be minimised.
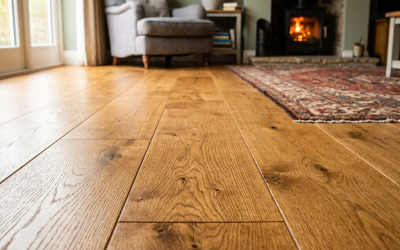
Hardwax oil and oil-based systems usually move at a slower pace. Osmo states that Polyx-Oil Original generally dries in around eight to ten hours for clear coats, longer for coloured versions, and that full cure can take roughly ten to fourteen days. That does not mean the room is unusable for two weeks, but it does mean homeowners need more care with traffic, rugs, furniture and cleaning in the early period. (osmouk.com)
So if your main priority is speed, lacquer often wins. If your priority is a more natural, repairable, lower-sheen look, oil or hardwax oil may be worth the extra patience.
A room-by-room guide to timescales
Bedroom
A standard bedroom in fair condition can often be sanded and sealed within one day, particularly if there are no major repairs and a quick-drying lacquer is used. Light use usually returns soon after, but furniture should still be reintroduced carefully.
Lounge
A lounge often takes one to two days because it tends to be more visible, larger and more heavily worn. More edging, more detail around hearths, and a higher expectation of finish quality all affect the pace.
Hallway
Hallways can be deceptively time-consuming. They may be smaller in square footage, but they involve thresholds, corners and higher wear. Access management also matters, because hallways are circulation routes.
Parquet room
Parquet usually takes longer than straight floorboards. Repairs, pattern preservation and finer finishing all increase the schedule.
Multiple connected rooms
Where rooms flow into each other, the logistics of keeping a wet edge, coordinating drying times and maintaining consistent colour across spaces all add complexity. That often pushes the project into a two- or three-day programme.
What can delay a floor sanding job?
Several factors can extend the process:
1. Heavy damage
Deep gouges, black staining, pet marks or old adhesive contamination often require extra cuts.
2. Repairs
Replacing missing boards, rebonding parquet or filling wide gaps takes time, but skipping it leads to a poorer result.
3. Staining
If you want a colour change, test patches, stain application and additional dry times must be built into the schedule. NWFA guidance also notes that stain must be completely dry before finishing proceeds. (All State Fooring Distributors)
4. Humidity and temperature
Both Bona and Osmo state that lower temperatures and higher humidity can extend drying times. So even if the sanding itself runs perfectly, finish schedules may slow down in damp conditions.
5. Access and layout
Top-floor flats, tight stair access, parking restrictions and complicated room layouts all affect productivity.
When can you walk on the floor, move furniture back and lay rugs?
This is one of the most important parts of the client journey. “Finished” does not always mean “ready for normal life.” With a modern lacquer system, light walking may be possible after roughly 24 hours, but the coating can still be vulnerable to scuffing before full cure. Bona advises waiting until the finish has fully cured before replacing area rugs. Osmo advises keeping traffic low during cure and not covering the floor too early, as rugs or mats can interfere with airflow and risk discolouration.
As a practical homeowner guide:
- light sock traffic: usually after the initial dry period advised by your contractor
- light furniture: often after 24 to 48 hours, depending on system
- heavy furniture and rugs: later, once the finish is sufficiently cured
- wet cleaning: only after the manufacturer’s advised window has passed.
The best way to keep the job on schedule
If you want the project completed as smoothly as possible:
- clear the room fully before the team arrives
- mention any loose boards, squeaks or previous repairs in advance
- be realistic about colour changes and stain testing
- choose the finish based on both appearance and downtime
- keep the home at sensible temperature and ventilation levels
- follow aftercare advice exactly once the finish is applied. (National Wood Flooring Association)
For homeowners comparing options, it also helps to read the company’s recent guides on hardwood floor refinishing and wood floor sanding, as they explain finish choices, grit expectations and the practical sequence in more detail.
Final answer: how long does floor sanding take from start to finish?
For most South West London homes, the sanding work itself is usually completed in 1 to 3 days, depending on room size, floor condition, repair needs and whether you are restoring boards or parquet. The broader “start to finish” timeline can be longer once drying and curing are included. A lacquer system can often get you back into the room sooner, while oil or hardwax oil systems usually need more patience for full cure.
The smartest approach is to treat floor sanding as a process, not a single appointment: survey, preparation, repairs, sanding, detailing, finishing, drying and aftercare all matter. If you want a realistic schedule tailored to your property, the best next step is to contact South West London Floor Sanding for a local assessment, product advice and a clear timetable based on your actual rooms rather than a guess.